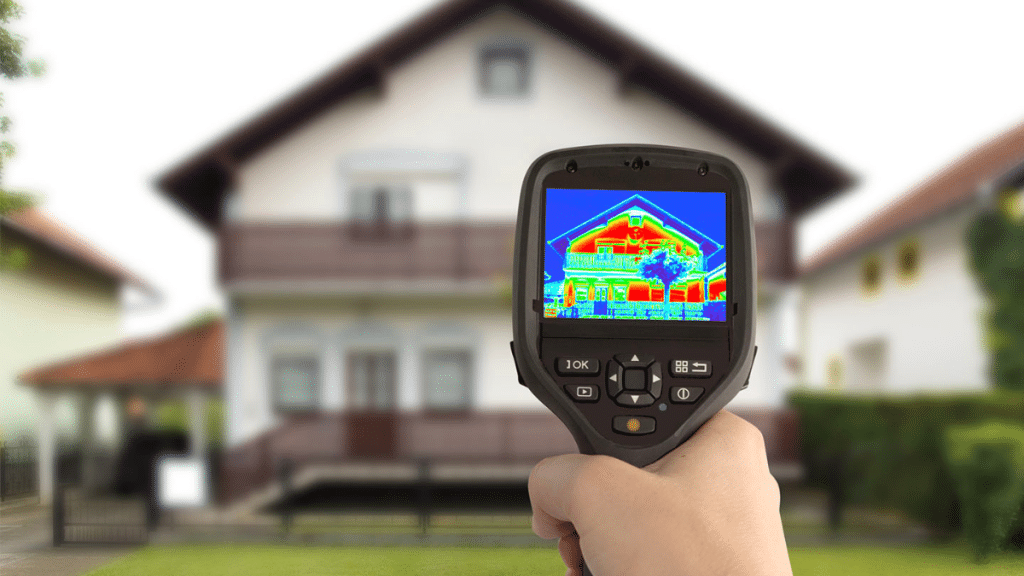
In both home inspections and electrical maintenance, accuracy and safety are essential. One of the most effective tools professionals and DIYers alike can use is an infrared (IR) camera. These devices allow users to “see” heat—revealing issues that are invisible to the naked eye. Whether you’re looking to detect hidden moisture behind walls, spot electrical hot spots, or simply improve energy efficiency, selecting the right IR camera can make all the difference.
So how do you choose the best one? Let’s break it down.
What Is an IR Camera?
An infrared (IR) camera, often referred to as a thermal imaging camera, is a device that captures infrared radiation (heat) and converts it into a visual image. Warmer areas appear brighter (often red or white), and cooler areas show as darker (blue or purple), depending on the color palette.
Unlike a traditional camera that captures light in the visible spectrum, IR cameras visualize temperature differences. This makes them incredibly valuable for detecting:
- Overheating electrical connections
- Insulation gaps
- Roof leaks
- Moisture intrusion
- HVAC issues
Why Use an IR Camera for Home and Electrical Inspections?
IR cameras are a non-invasive and efficient way to troubleshoot problems before they become major hazards or costly repairs. In home inspections, thermal imaging helps uncover issues hidden within walls, ceilings, or floors. In electrical work, they’re used to detect overheating circuits, loose connections, and potential fire hazards.
Their benefits include:
- Speed: Get instant insights without dismantling walls or equipment.
- Safety: Inspect live electrical panels from a safe distance.
- Preventive Maintenance: Identify and fix issues before they cause downtime or damage.
Key Features to Look For in an IR Camera
Choosing the right thermal camera depends on your specific needs, but here are the top features to consider:
1. Resolution
Thermal resolution determines how detailed the image will be. Higher resolution cameras provide more precise data, which is especially useful for identifying small temperature differences.
- Entry-level: 80×60 or 120×90 (Good for basic home use)
- Mid-range: 160×120 or 320×240 (Ideal for professionals)
- High-end: 640×480 or higher (Best for industrial or advanced applications)
2. Thermal Sensitivity
Also known as NETD (Noise Equivalent Temperature Difference), thermal sensitivity indicates how well the camera can detect slight temperature changes. A lower NETD (measured in mK) means better sensitivity. Look for a sensitivity of ≤ 100 mK for general use.
3. Temperature Range
Make sure the camera covers the temperature range you’ll be working with. For home inspections, a range of -20°C to 150°C is typically sufficient. For electrical applications, especially industrial, look for models that go up to 400°C or more.
4. Focus System
Some IR cameras have a fixed focus, while others feature manual or auto-focus. For professionals who need sharp images on components at varying distances, adjustable focus is crucial.
5. Image Overlay and Blending
Many IR cameras offer features like MSX® (Multi-Spectral Dynamic Imaging) or image blending, where thermal images are overlaid on visible light photos. This helps users better interpret what they’re seeing and precisely locate the issue.
6. Screen Size and Interface
A clear, large screen makes it easier to interpret thermal images in the field. Touchscreen interfaces are common in more advanced models, improving navigation and functionality.
7. Connectivity and Storage
Look for built-in Wi-Fi or Bluetooth if you want to transfer images to your phone or computer quickly. Also, ensure the device has enough internal storage or supports SD cards for saving inspection data.
IR Cameras for Home Inspections
If you’re a home inspector or even a homeowner looking to assess your property, focus on features like good thermal resolution (160×120+), image blending, and easy file sharing. Some well-regarded brands include:
- FLIR (e.g., FLIR ONE Pro, FLIR E6-XT)
- Seek Thermal
- Testo
These tools can help detect issues like:
- Leaks under bathroom floors
- Poorly sealed windows and doors
- Missing or compacted insulation
- Radiant heating system malfunctions
IR Cameras for Electrical Work
For electricians and facilities managers, the priority should be temperature accuracy, sensitivity, and a higher operating range. You’ll also want robust housing and the ability to work in tight or hot environments.
Use cases include:
- Checking circuit breakers for overheating
- Inspecting control panels
- Diagnosing HVAC systems
- Preventing arc flash risks
Look for cameras that include emissivity adjustment and spot temperature measurement. Higher-end FLIR, Fluke, or HIKMICRO models often excel in this area.
Budget Considerations
You can find decent thermal cameras for under $300, often as smartphone attachments. However, professional-grade models can cost between $800 and $3,000 or more, depending on features. It’s worth investing more if:
- You’re using the tool regularly
- Precision is critical for safety or compliance
- You need detailed reporting and integration features
Final Thoughts
IR cameras are no longer niche tools limited to elite technicians—they’ve become accessible, versatile, and essential for many inspection jobs. Whether you’re ensuring your home’s insulation is intact or safeguarding your electrical setup from costly failures, the right IR camera can give you a major advantage.
By focusing on the right resolution, sensitivity, and use-specific features, you’ll be better equipped to choose a tool that meets your needs. From basic home diagnostics to complex electrical troubleshooting, a reliable IR camera delivers both peace of mind and professional-grade performance.

