


There are plenty of different types of videos you can make on YouTube that is pleasing, informative, and entertaining to watch. One such type is explainer videos. Explainer videos refer to short informative videos that can help promote your product, idea, vision, or even educate an audience about something. Many think explainer videos are difficult and expensive to produce, but that could not be further from the truth!
With a video editing tool like Wondershare DemoCreator, you can easily make your explainer video in a matter of minutes.
Importance of explainer videos
Explainer videos, as mentioned earlier, can be used in a variety of different and innovative ways. For example, many companies are known to have used such videos to promote their products and vision. Many companies have reported a 144% increase in traffic after uploading the explainer video on their website and social media accounts. This is a clear indicator of how crucial these videos can be for advertising and marketing.
Types of explainer videos
Here are some types of explainer videos that you can make.
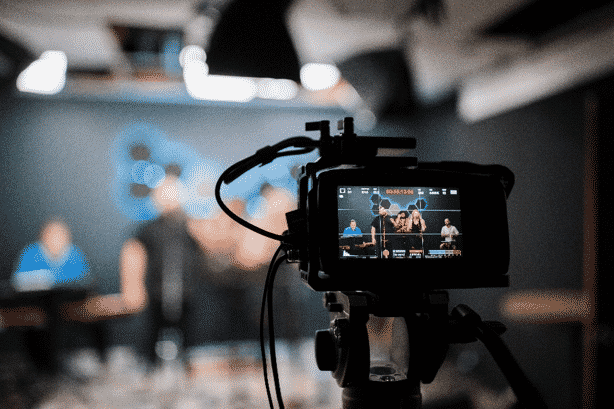
Live-action explainer videos
These are non-animated promotional videos and are very popular as they have a sense of realism in them.

Whiteboard explainer videos
They are a type of animated video in which animations are drawn and erased on a whiteboard. They are becoming increasingly popular these days as they are pleasing to watch and cost-efficient.
Animated explainer video
Animated explainer videos are perhaps the most popular form of explainer videos. This is because it offers more creativity and can be easily edited at any point in the future.
How to make an animated explainer video
An animated explainer video can seem arduous and taxing as many assume that they will have to hire professionals for this task. Here is a step-by-step guide on how to make the animated explainer video on the Wondershare DemoCreator.
Step 1: choosing a video style
Before starting, it’s important you decide what type of video style you want to use. It’s important that you use a style that will effectively get your message across to your target audience. Some styles include live-action/talking head, screencast, and so forth. In any case, the Wondershare DemoCreator screen recorder for pc can help you out.
Step 2: record your screen and voiceover
Before you start recording, it is important to write a script that captures the audience’s attention and is captivating. Once you have written a script that is engaging and informative at the same time, it’s time to start recording.

There are two ways to record screen and voiceover on Wondershare DemoCreator. Both of them are easy to use and are explained in detail below.
Method 1
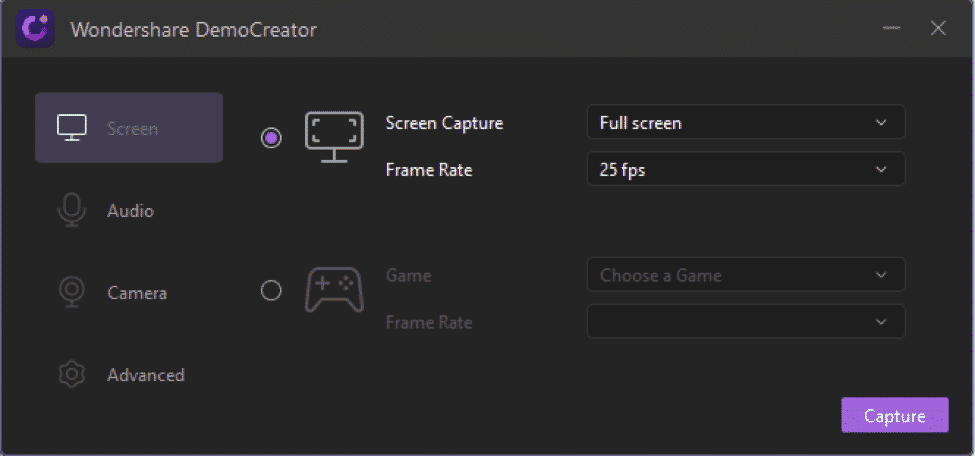
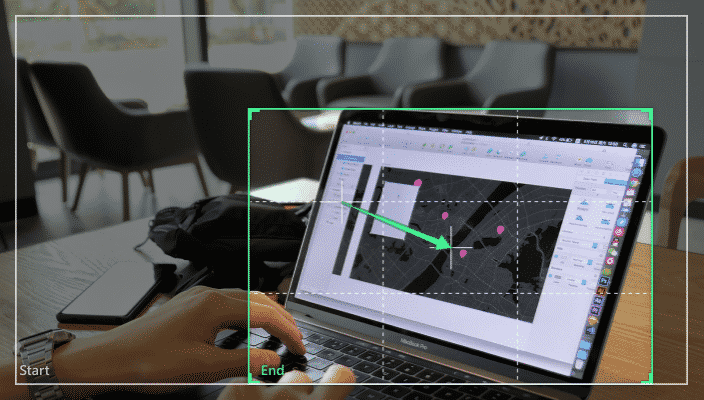
Firstly, ensure that your audio recording device is properly connected to your computer. Make sure the cables are properly fixed so that there are no interruptions during the recording. Then, you have to do a quick capture with Wondershare DemoCreator.
That can be done by clicking on the quick capture when you open the app. Next, choose the region of the screen you want to record by dragging the border to the place you want to record. After that, enable mic recording by going on audio setup and choose the mic of the recording device you have connected. Lastly, press the F10 key to start and terminate the recording.
Method 2
This method is more useful for existed video files. Firstly, ensure that your recording device is firmly connected to your computer. Next, choose the video file and add it to the timeline in the Wondershare DemoCreator app. The next step is to enable audio recording by going on audio setup. After that, you can start recording.
Step 3: editing it to perfection
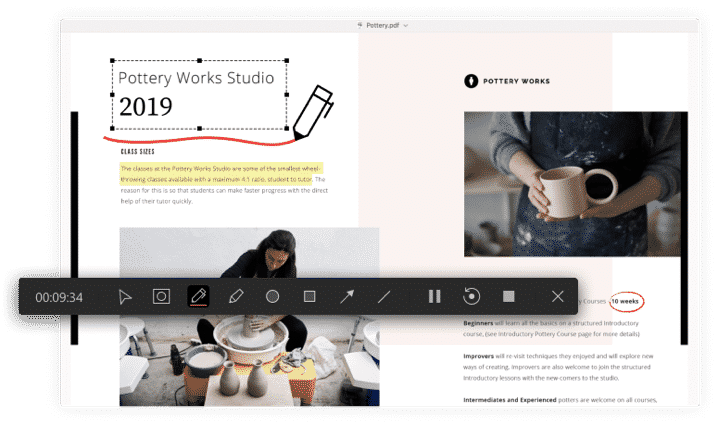
Once you’re done with recording your voiceover and screen, the next step is editing. Wondershare DemoCreator allows you to edit your video by removing mistakes, shots you don’t like, background noise, and anything else that may seem unnecessary or redundant. To further enhance your video, the application offers you to add transitions, captions, stickers, annotations, and a plethora of other things to make your video more interesting as well as to fully convey your message. Additionally, the edits do make your video aesthetically pleasing.

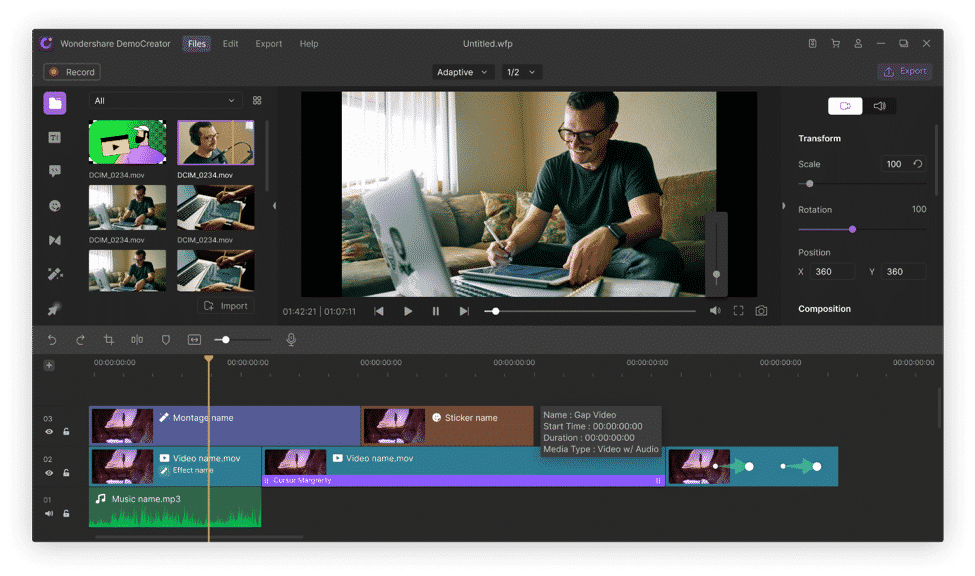
Moreover, adding captions can make the viewer understand what you are trying to say. All of these can easily be done on Wondershare DemoCreator in a matter of minutes.
New Editing Features on Wondershare DemoCreator
Furthermore, there have been some great new features added in the latest software update. You can now draw on the screen, spotlight a specific point, and zoom in and out to add effects. Here are some of the most exciting ones:
- Mouse Spotlight: this new feature allows you to stress any specific point in the video. If you want the viewers to pay attention to a particular point, this is the feature you need.

- Zoom In and Out: this is also primarily used to draw in attention of the viewer and show them a detailed view of the point. The DemoCreator video editor now also lets you pan left or right within the same clip that could improve how you convey your ideas.

- Audio Fading: while there are plenty of effects to add to your video, the Wondershare DemoCreator now also allows you to play with the background music. You can now reduce background noise or customize the audio to amplify at certain points.

- Real-time screen drawing: with the new update, you can now easily use the pen feature to write or draw on any part of the screen. The new update also allows you to add shapes in case you’re looking to highlight something for the viewer.

- Cover Animation: this latest feature is what video editors dearly missed; something to help them make an intro to keep the viewers on the edge of their seats at all times. You now 18 kinds of built-in animations for both intro and outro as well as the end credits and the subtitles.


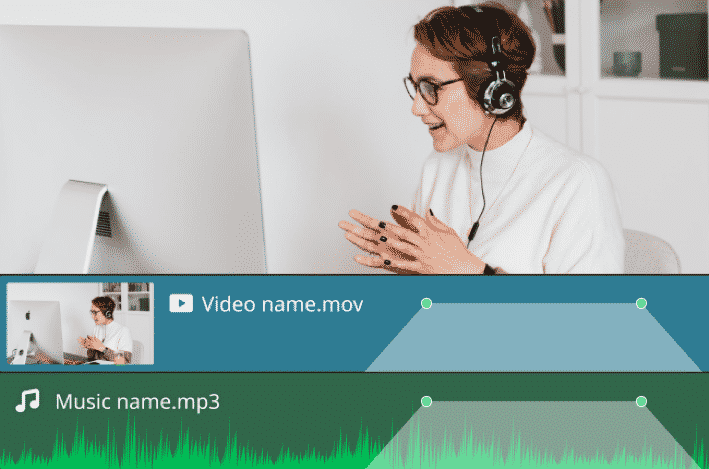
Step 4: add music to your video to take it to the next level
Music is a great way to add to the ambiance of your video as it can evoke the audience’s emotions and can further enhance your video. Use the DemoCreator to import the music file to the app and embed it into your video.
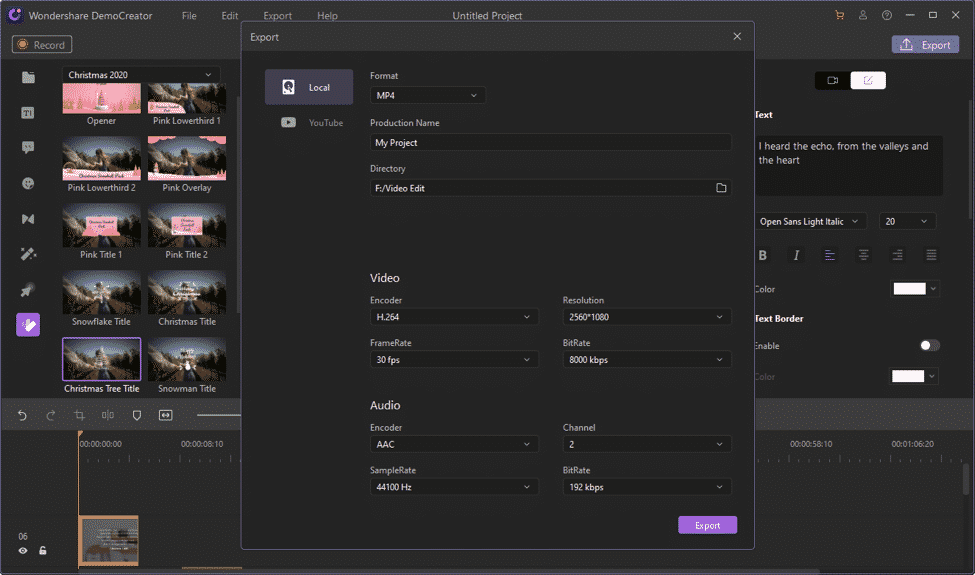
Step 5: exporting your video
Once you are done editing your video, adding music, and your voiceover, it’s time to export your file from the application so that the whole world can see the masterpiece you have created. The video can be exported in many different formats which include MP4, WMV, AVI, MOV, GIF, MP3 formats.

Explainer videos are an excellent way to get the message across to the audience and have proven to be effective, if made correctly. So if you’re looking to make an explainer video that is pleasing to the eye and informative without having to go through the hassle of hiring a professional and paying them, then download the Wondershare DemoCreator software today and get started.